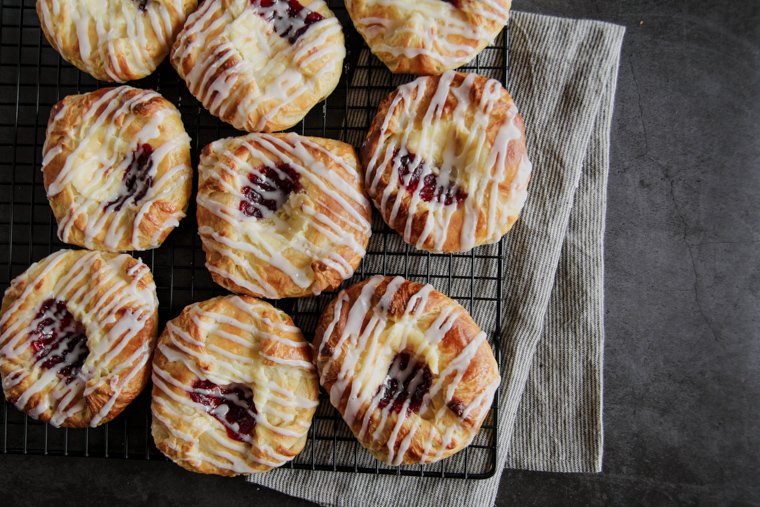
Sourdough Danish Pastries: Step by Step Recipe
Sourdough Danish Pastries: Step by Step Recipe - Sourdough Recipes
Servings16
Plan it in the app to put it on your week.
- Vegetarian
- Pescatarian
- Halal
Steps
- 1Day 1Feed starter several hours prior to making dough and allow it to peak.Sourdough Danish Dough:
- 21. Combine sourdough starter, sugar, salt, cardamom, melted butter, egg and egg yolks, milk, and vanilla extract to a large bowl and stir to combine (weigh ingredients for the best results). Add the flour and stir until a shaggy dough forms.
- 32. Turn the dough out onto a clean countertop and knead for a few minutes until the dough smooths out.
- 43. Form the dough into a ball and place in a bowl with a lid propped on the top or cover with plastic wrap. Set in a warm place to ferment for 5 hours, or until the dough has increased in size by about 1/3. Cover tightly and refrigerate for 12 hours (or up to 2 days).Day 2
- 5Butter Block:
- 61. Just before you are ready to laminate your dough on day two, make your butter block. Place the cold butter on a sheet of parchment paper and sprinkle with the flour.
- 72. Cover the butter loosely with the parchment and begin to beat the butter gently with your rolling pin until butter begins to flatten. (Update: I now find it easier to measure and fold the parchment before placing the butter inside.)
- 83. Crease the edges of your parchment paper and fold the top and bottom ends over your butter in the shape of an 8 x 7-inch rectangle (measure for accuracy).
- 94. Roll and press your butter to fill the rectangle evenly.
- 10Chill for a few minutes if your butter has begun to melt on the edges. The butter should be cold but very pliable and the same consistency as the dough for the next step.
- 11Lock in Butter Block:
- 121. Remove dough from refrigerator and roll it out to a 16 x 9-inch rectangle, keeping the corners as square and even as possible.
- 132. Place your butter block in the center of the rectangle and fold the edges of the dough over the butter so they meet in the middle of the butter block. Brush away any loose flour with a pastry brush.
- 143. Press the center seam together to seal it shut. Then press the top and bottom edges to seal them so the butter won't escape during rolling.
- 15First Fold (Book Fold):
- 161. Rotate your dough so your center seam is horizontal to you. Roll out to a 20 x 12-inch rectangle, focusing on keeping the corners even. Using the rolling pin to pound the dough gently can help you begin to flatten it evenly before you roll.
- 172. Bring each of the short ends to meet in the center of the rectangle, and then fold the rectangle in half like a book. Brush away loose flour as you go.
- 183. Wrap your dough in plastic wrap and place in the refrigerator to chill for 20 minutes.
- 19Second Fold (Tri-Fold or Letter Fold):
- 201. Remove dough from fridge and unwrap. With the fold of the "book" horizontal to you, roll the dough into another 20 x 12-inch rectangle, still making sure the corners are even.
- 212. Fold the dough in thirds as if your are folding a letter.
- 223. Wrap your dough in plastic wrap and chill for 1 hour or overnight.
- 23Make the Pastries:
- 241. Unwrap dough. With the folded side horizontal to you use a knife to cut the dough in half from bottom to top. Set one half aside. Roll the other half into a 16 x 8-inch rectangle.
- 252. Trim the edges with a pizza cutter, then cut the dough into eight squares.
- 262. Brush a little egg wash in the center of one square. Fold the corners to the middle and press them down to seal.
- 273. Repeat with remaining squares. Arrange pastries on parchment-lined half sheet pans (no more than 6 to a pan) and cover loosely with plastic wrap.
- 284. Roll, cut, and shape remaining dough in the same manner (wrap shaped pastries in plastic and refrigerate until ready to proof and bake if you don't have enough baking sheets or oven space to bake more than one pan at once).
- 295. Leave the pastries at room temperature (preferably under 75°F) to proof until they look puffy (1-2 hours or more).
- 306. Meanwhile, prepare your egg wash and cheese filling. Beat egg and milk in a small bowl until well combined. Set aside. In a medium-sized bowl, beat softened cream cheese until smooth, then beat in remaining cheese filling ingredients until smooth. Set aside. (If making streusel, prepare now and chill *recipe can be found in blog post body.) Preheat oven to 425°F.
- 317. After proofing, wet your fingers and press down the centers of the pastries again to make room for the filling. Gently brush the surface of the pastries with egg wash.
- 328. Drop about a tablespoon of cheese filling into the center of each one. Then drop about half as much preserves on top of the cheese. (At this point, sprinkle on nuts or streusel if using.)
- 339. Bake one pan at a time on the center rack in a 425°F oven for 12-15 minutes or until golden brown.
- 3410. To make glaze, whisk together powdered sugar and milk until smooth. Pipe glaze on pastries with a plastic piping bag or plastic zipper bag with the very tip cut off, or drizzle on with a fork.
Nutrition
- Calories
- 414kcal
- Protein
- 6g
- Carbs
- 51g
- Fat
- 21g
- Fiber
- 1g
- Sugar
- 18g
Estimated from the ingredient list.
Make it yours
Swap ingredients, change amounts, and keep your own copy. The original stays exactly as it is.
Questions
How long does sourdough danish pastries: step by step recipe take to make?
About 0 minutes from start to finish, including prep.
How many people does this recipe serve?
It serves 16 as written. Use the servings control to scale every ingredient up or down.
Can I change the ingredients?
Yes — in the Zaki app you can make this recipe yours: swap ingredients, change amounts, and keep your own copy. The original stays as it is.